How to
How to use RAYA
From a real room to a quotation in 6 steps, on phone or computer. Every picture on this page is from the real app, using a 4 × 4.5 m bedroom. The screenshots show the app in Thai.
Video guide
Every step in one clip
From opening the app and laying out a room to the 3D view, the construction drawings, the BOQ and the quotation. Recorded in the real app from start to finish, with Thai captions.
The other is a built-in job: a 2.4 m kitchen counter, and the app works out how many boards to order.
One task at a time
The first five tutorials
About a minute each, one task per episode, from opening the app to arranging the inside of a cabinet. Recorded in the live app, with a Thai voice-over.
Techniques
Cabinet techniques
This display unit, rounded ends and arched glass doors, is made entirely in the app, grooved panel in the middle included. Each clip below shows one technique, recorded in the real app on a computer with its screens in Thai; the buttons named beside each clip are as they read in English.
-
Rounded ends
Tap the cabinet and open “More” at the end of its card. The row “Corner radius R (mm)” takes each corner’s radius in millimetres, “front left”, “front right”, “back left” and “back right”, with the cabinet drawn from above.
On a 300 mm deep cabinet, type 150 at both the front and the back corner of one end and that end becomes a half circle. The top follows the curve by itself.
-
Arched glass doors
Tap the wall cabinet, choose “Clear glass” under “Door fronts”, then open “More” and set “Door top” to “Arch per pair”. The two doors share one arch.
Type how high the arch rises, in millimetres, under “rise”; the clip uses 420. For an arch over each door, press “Arch per leaf”.
-
Grooved door fronts
Tap the cabinet and press “Routed-groove doors” under “Door fronts”. Each door gets a groove in a rounded rectangle; a drawer gets a long one with round ends.
-
A grooved panel on the wall
In the 3D view, press “Draw” on the bottom bar, tap the wall where the panel goes and pick “Rectangle”. Open “Details”, press “🔒 Keep proportions” so it reads “Stretch width/height separately”, then type the width and the height.
Press “Pattern”, pick “grooves”, set “Spacing” to 25 mm and press “Done”. Slats and flutes are in the same row.
-
Heights with Push/Pull
In the 3D view, press “Push/Pull” on the bottom bar, then drag a cabinet up or down. Its height shows next to the pointer while you drag.
In the clip the wall cabinet goes from 1.00 to 1.40 m. Walls drag the same way.
Step 1
Open the app and sign in
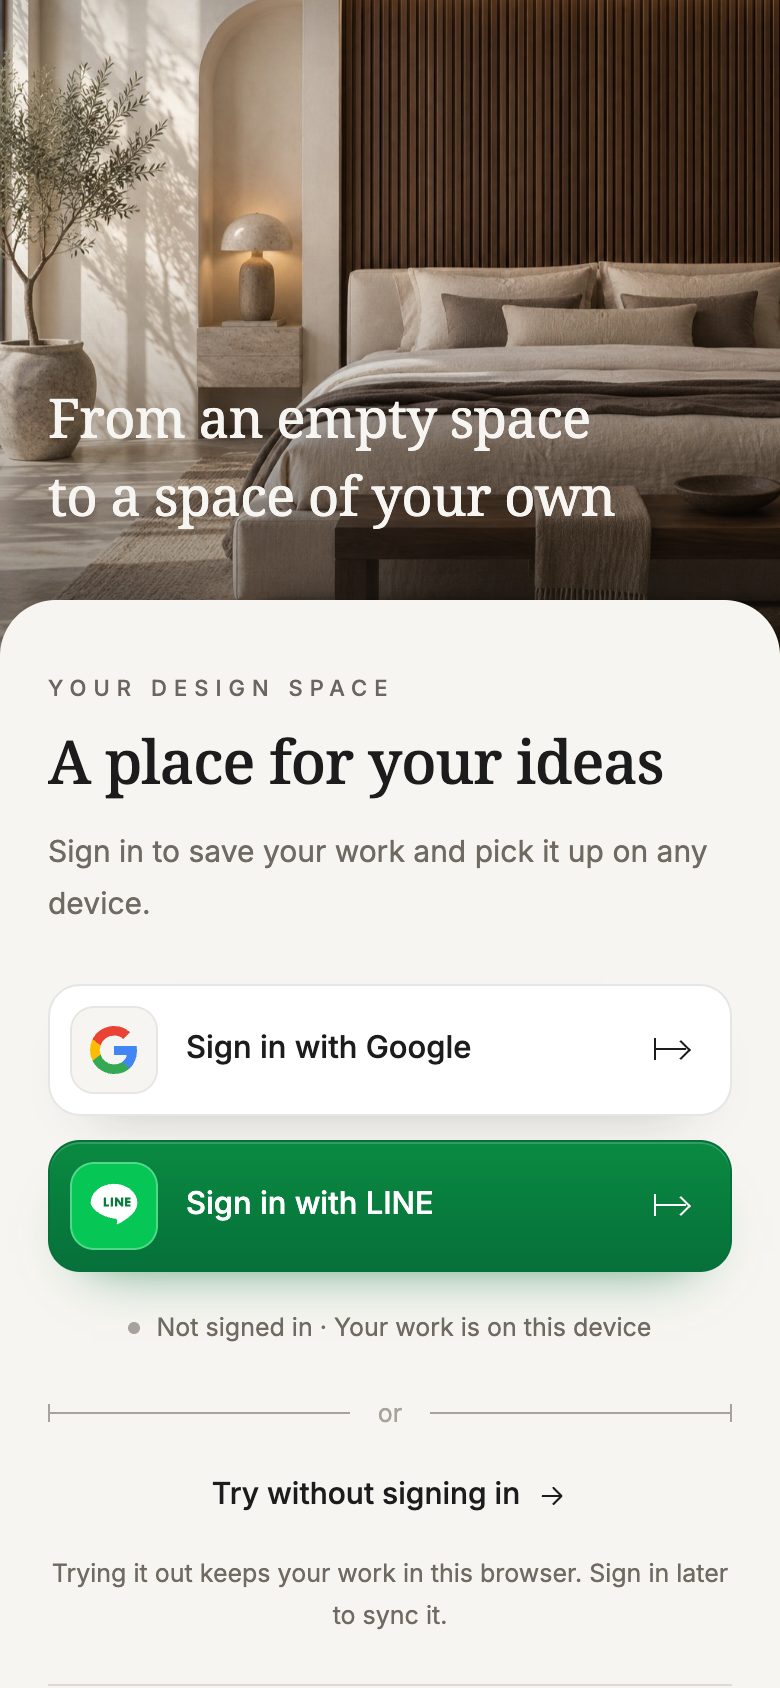
Tap “Open app” on raya-studio.com. The first time, you are asked to read and accept the terms. Then sign in with Google or LINE for free. The free plan keeps 1 project on the device you are using; with a plan, your work is saved to your account and opens on any device.
Not ready to sign up? Tap “Try without signing in”. Your work stays in that browser, and you can sign in later.
Step 2
Choose a room
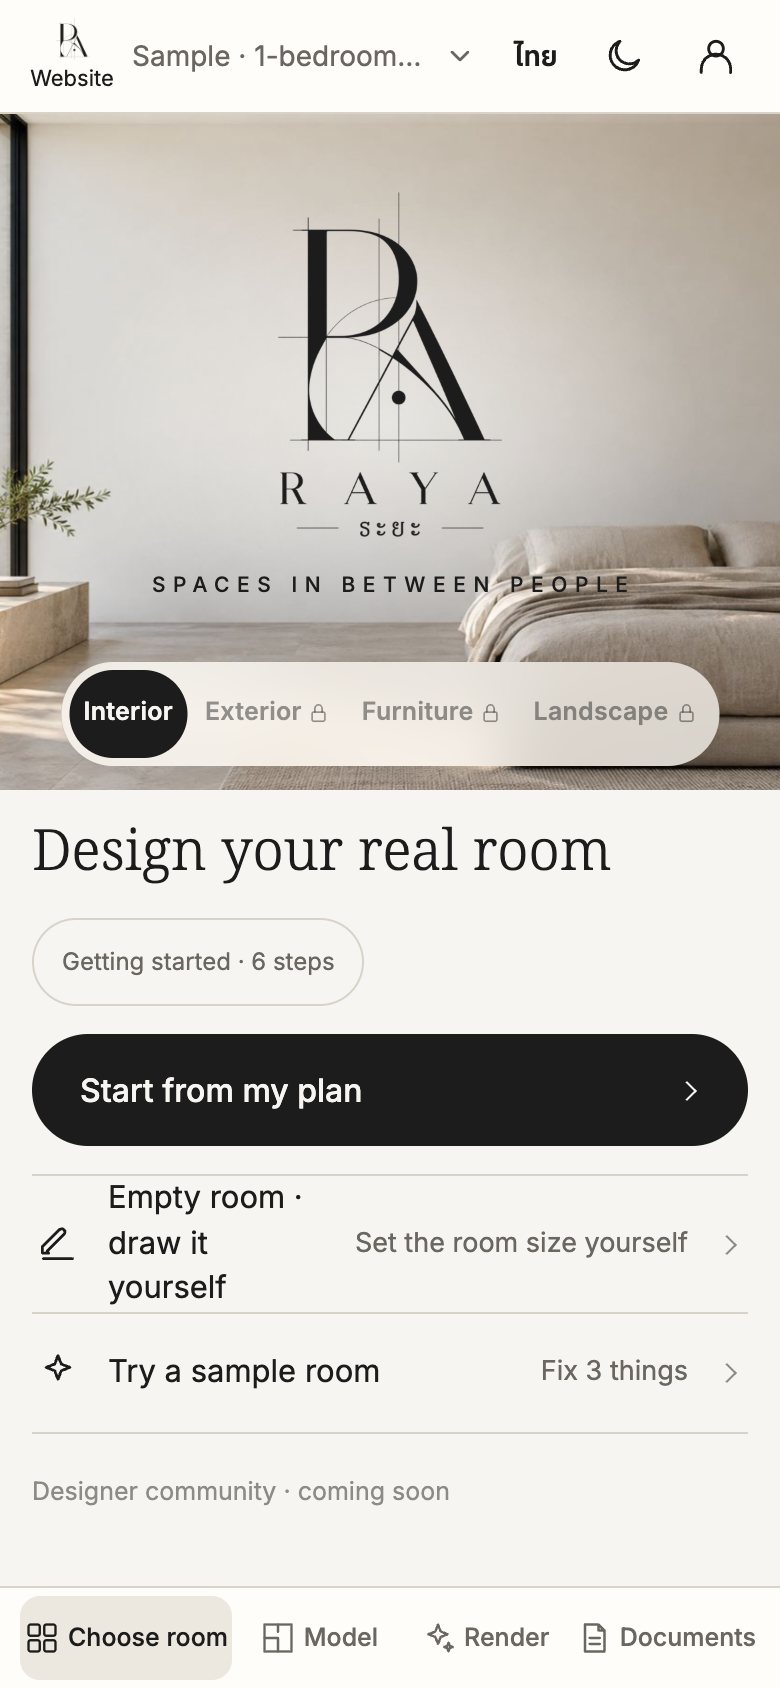
In the “Choose room” tab, tap “Start from my plan” and pick a DXF file from your architect or a plan image. No plan yet? Scroll down to more than 20 sample rooms: condos, bedrooms, kitchens, bathrooms, cafés and shops.
Tap “Try a sample room” to get a bedroom that isn’t quite right yet, with 3 things to fix.
Step 3
Arrange the room on the plan
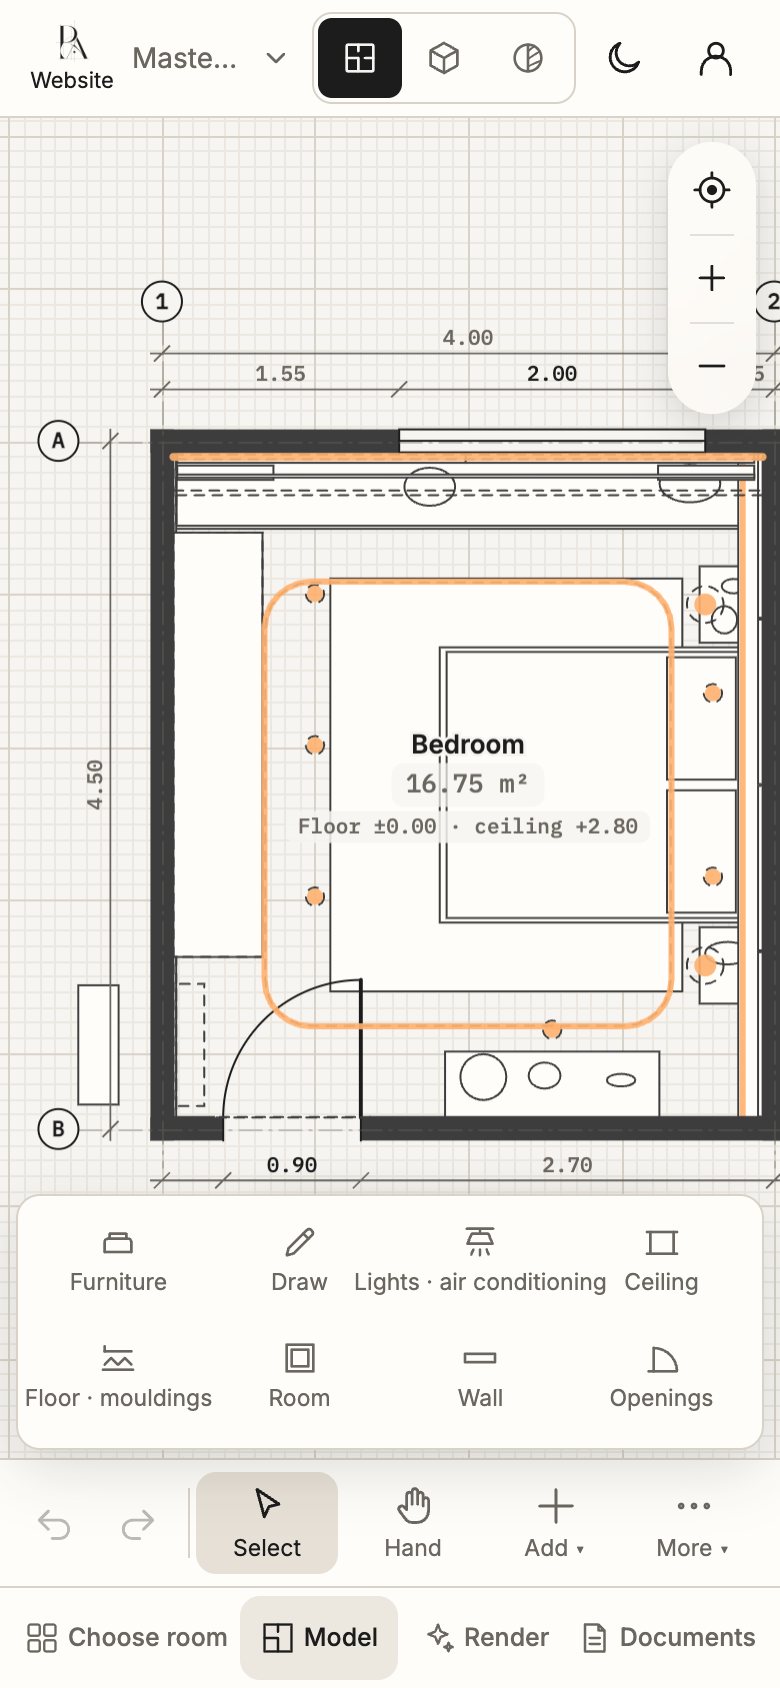
In the “Arrange” tab, the “Add” button has furniture, lights and air conditioning, ceilings, rooms, walls and openings. Tap anything you have placed to type in its size.
In the clip: tap a window and change its width from 1.60 to 2.40 m. The dimensions on the plan follow.
Step 4
See it as a 3D clay model
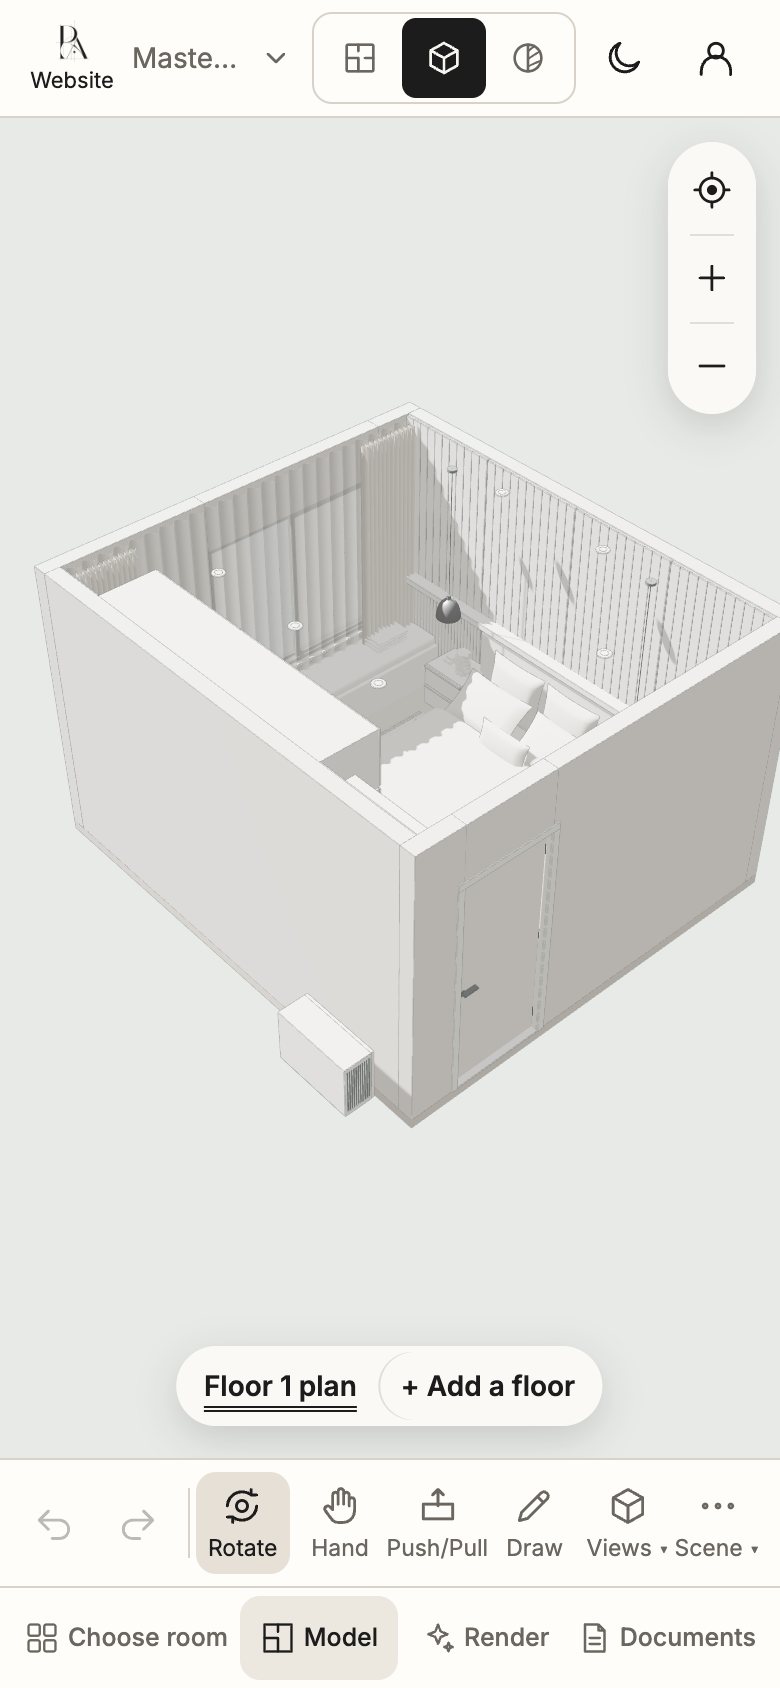
Tap the 3D button at the top and the whole room becomes a clay model. Drag to orbit, use two fingers to zoom or pan, and tap an object to select it and drag it somewhere else.
On a computer, drag with the mouse to orbit. See the clip below.
Step 5
Render for your client
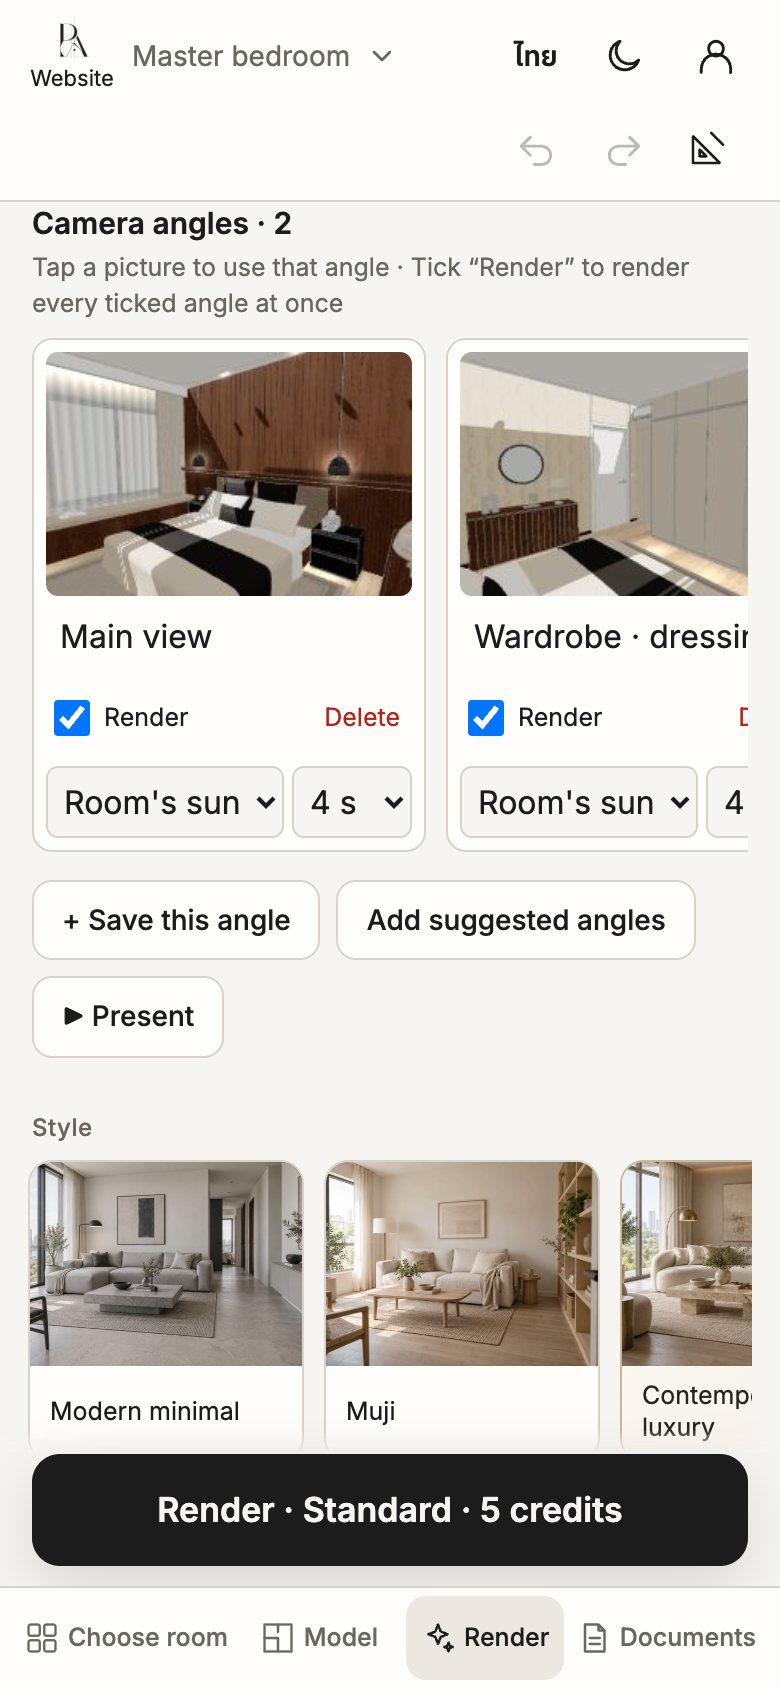
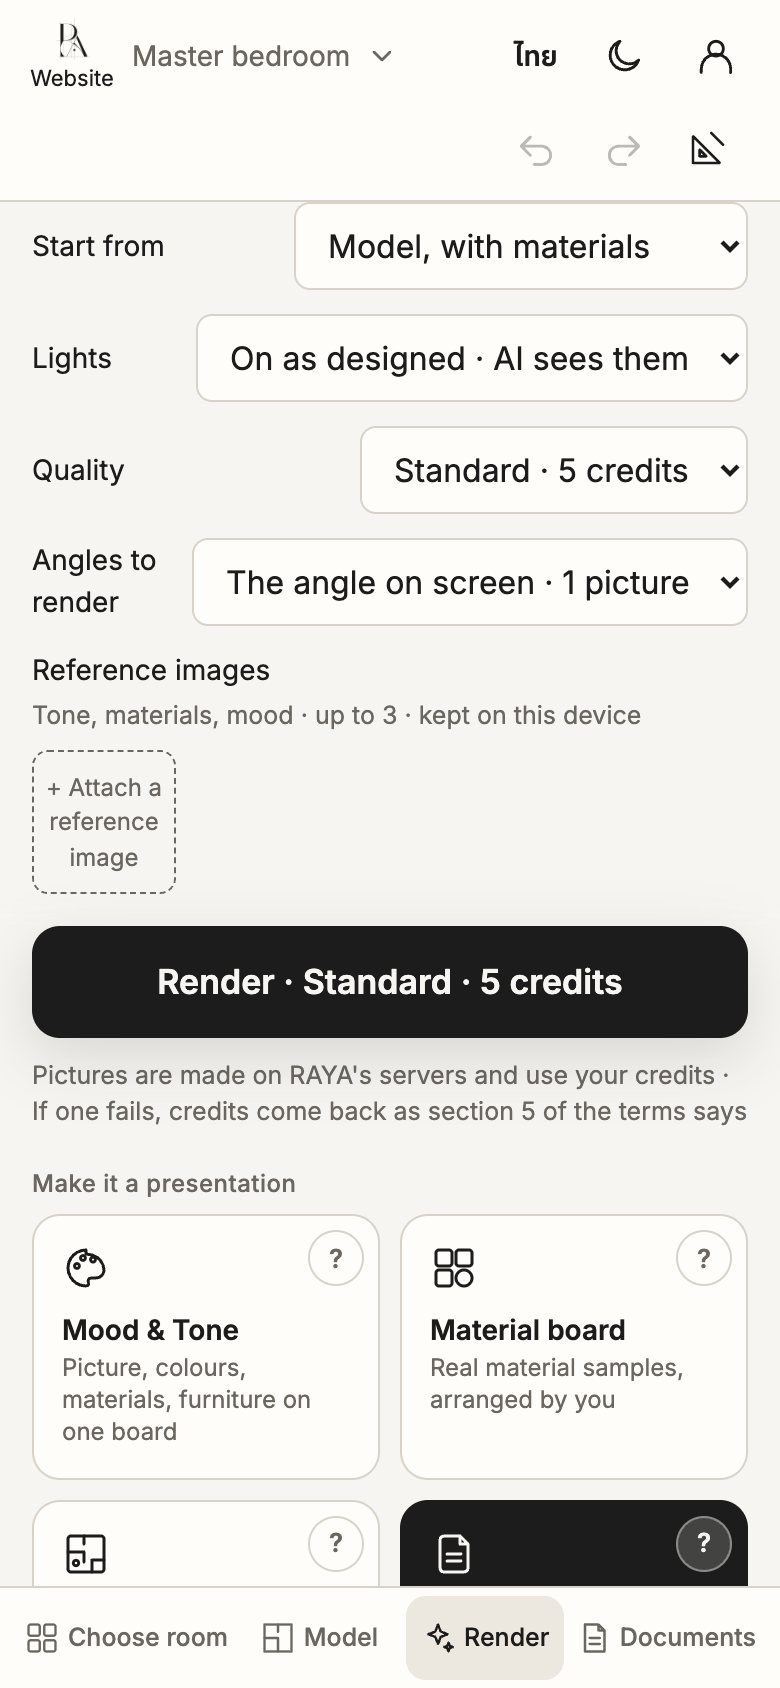
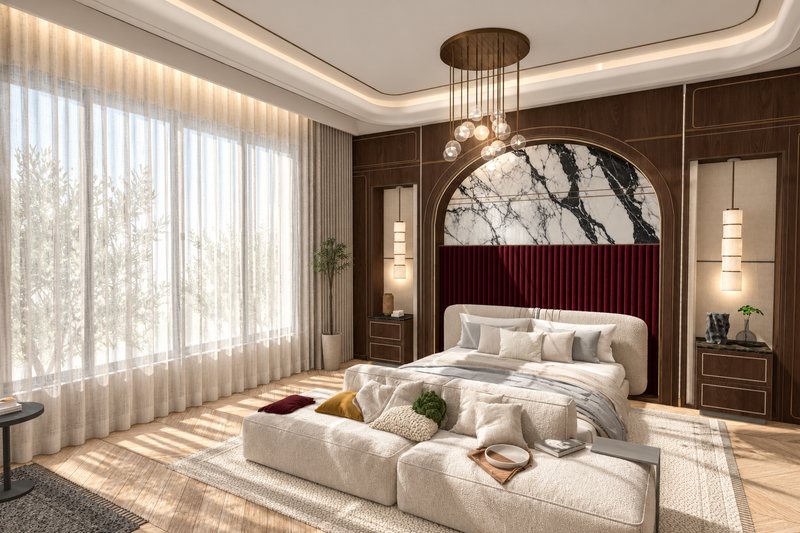
In the “Render” tab, choose a camera angle, pick one of 13 styles from their sample pictures, from Minimal to Luxury, choose a quality and tap “Render”. Images are made on RAYA’s servers. A Standard render uses 5 credits and a High render 15. If a render fails, credits come back as § 5 of the Terms sets out.
Under the button, “Build a presentation” makes Mood & Tone boards, material boards, presentation plans and A3 presentation sheets, and “Fine-tune” adjusts colour, light, materials and aspect ratio and takes reference images.
Rather render in ChatGPT yourself? Tap “View prompt” and the app writes an English prompt from your model. When you have the image, tap “ChatGPT image” to set it beside the clay view.
Step 6
Job documents
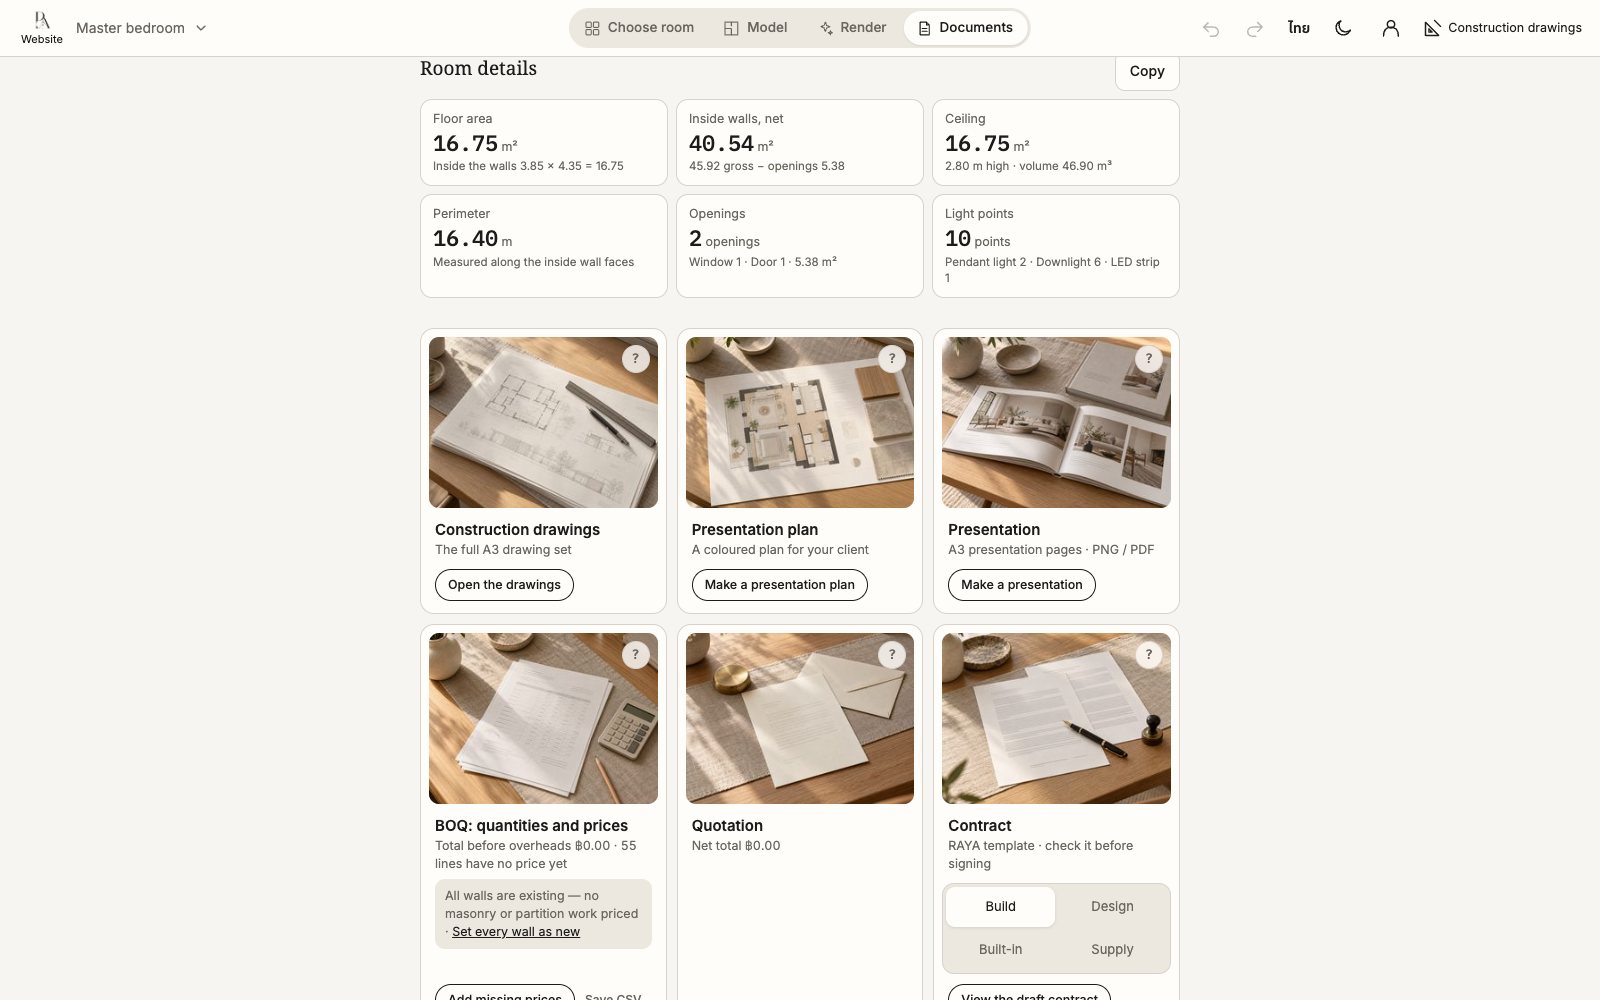
The “Documents” tab is a row of cards in the order the job runs. Every one comes from the same model, so when you change the room, the quantities and prices follow straight away.
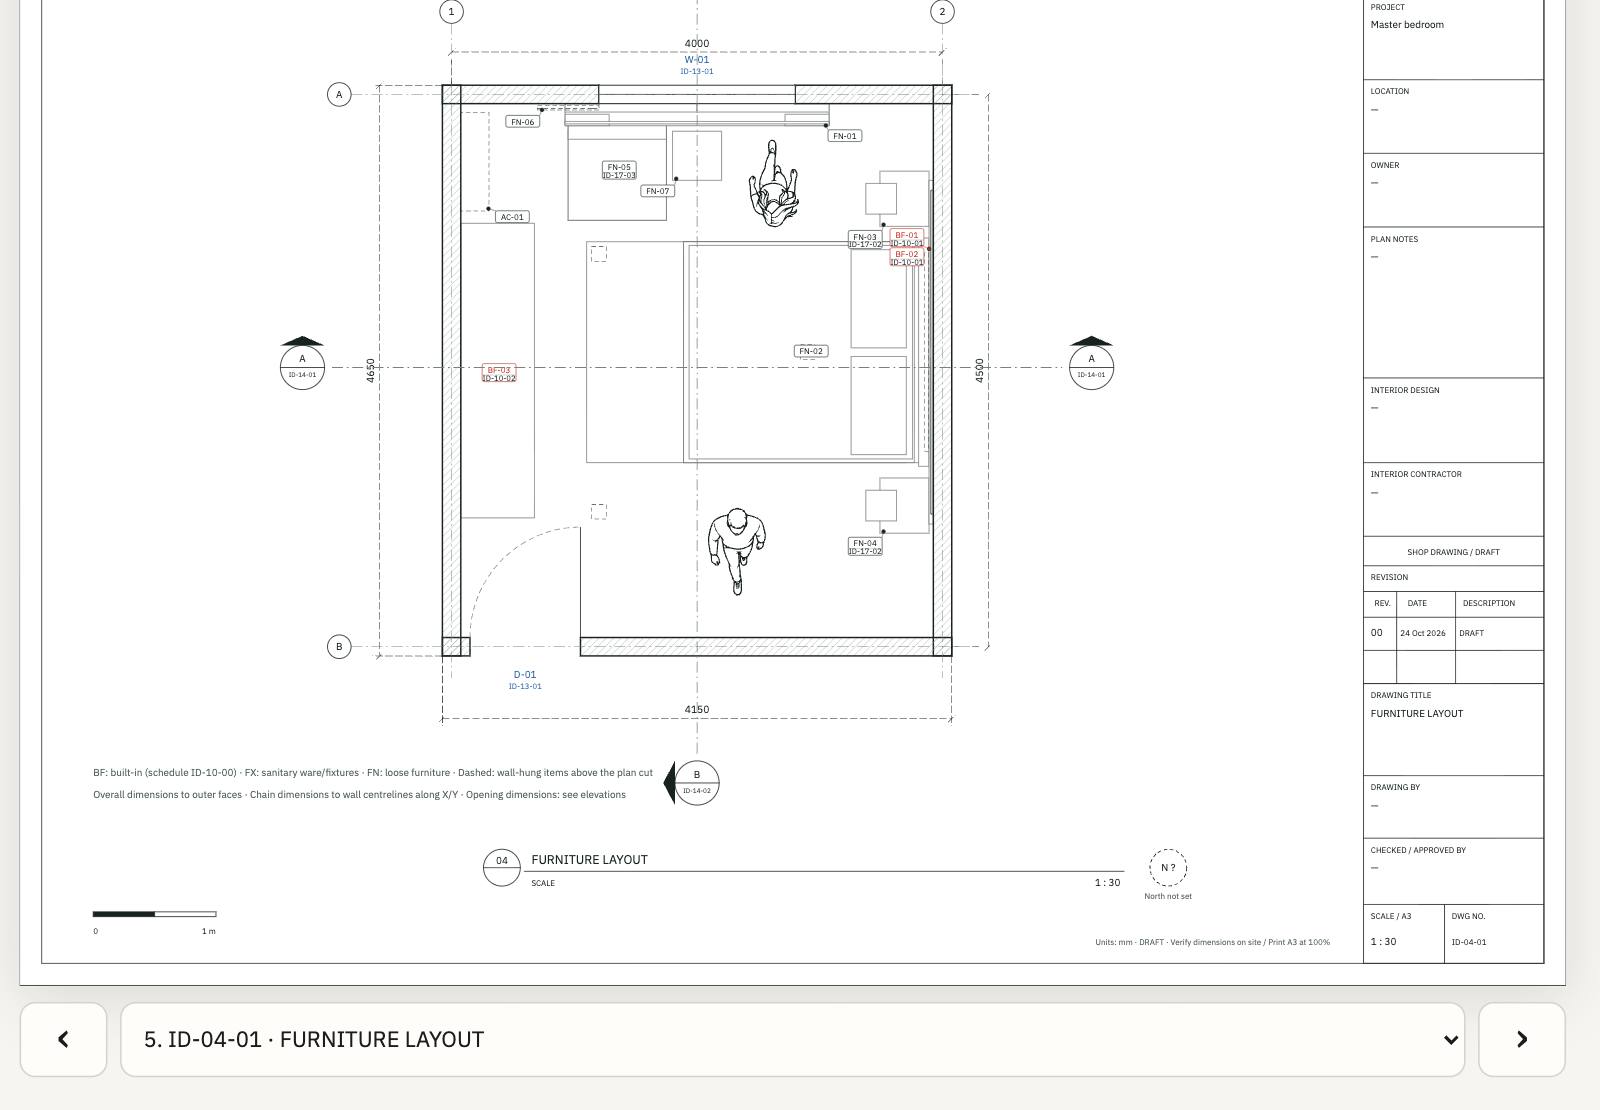
- A complete A3 construction set: this one bedroom runs to 48 sheets, with furniture layout, lighting circuits, ceiling and air conditioning, elevations and built-in details.
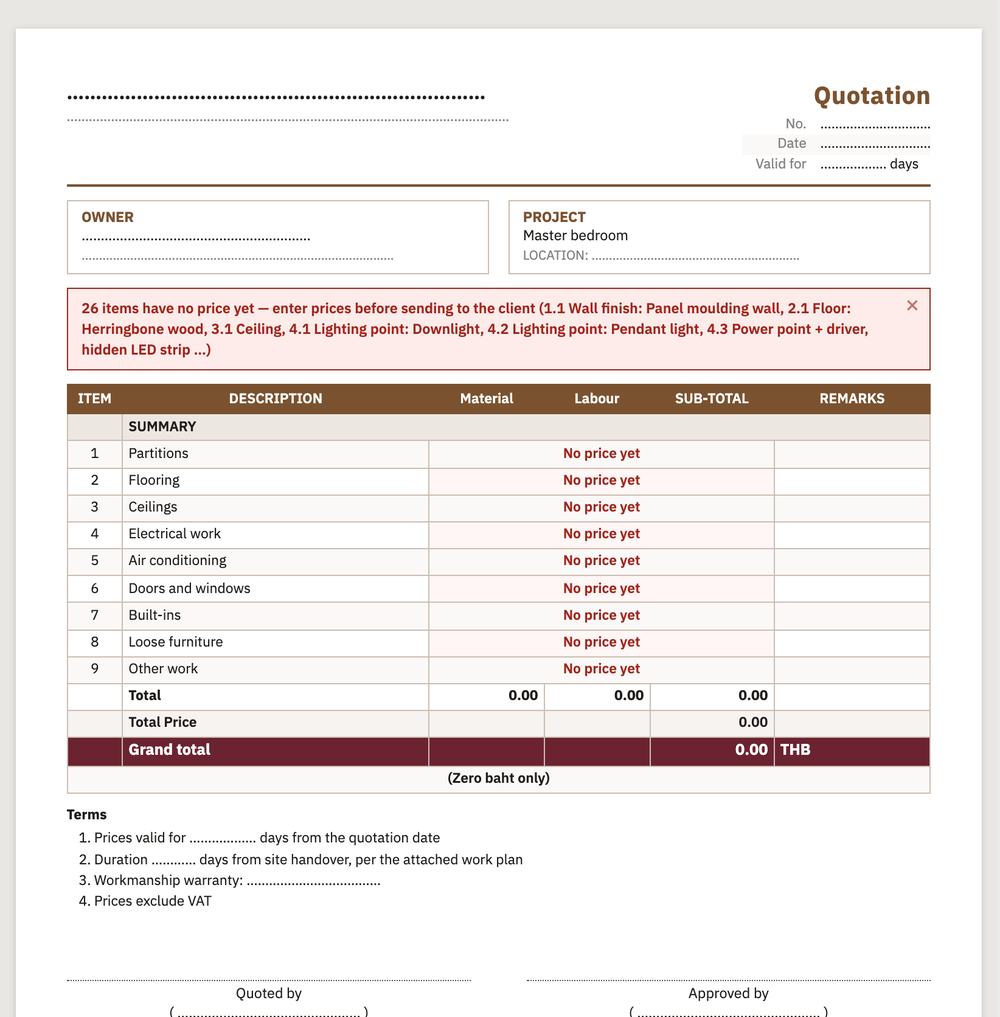
- The BOQ does the take-off and you enter your own unit prices. Any line without a price reads “No price yet” on the documents until you add one.
- Quotation, work schedule, construction contract, and purchase orders split by supplier.
- Invoices, payments, receipts and variations: tap “Lock the contract scope” when the client signs, and the app works out what was added and what was cut.
- Before anything goes to a client, tap “Add business details” so your company appears on the documents.
Every document can be viewed on screen for free, with a RAYA · PREVIEW watermark. Downloading, printing and saving files such as PDF, Excel, CSV, DXF and PNG needs a plan.
Terms
Terms on this page
- Floor plan
- Elevation
- Construction drawings
- Presentation drawings
- Built-in
- Laminate
- BOQ
- Quotation
- Variation order
More words you meet when doing up a home are in the Interior design glossary
Model your first room
You can start from a sample room. Stuck anywhere? Message us on LINE @raya-studio or see plan prices on the home page
Open app